Whether you're a junior developer dipping your toes into AI integrations or a seasoned pro looking to streamline secure data connections, deploying a Model Context Protocol (MCP) server on Phala Cloud is a powerful way to enhance your projects. This guide will walk you through the process, breaking it down into manageable steps while explaining key concepts along the way.
By the end, you’ll have a fully functional MCP server running on Phala Cloud, get ready to connect your AI tools to external data sources securely.
I'm Wenfeng, Head of AI at Phala Network. I'll walk you through the step-by-step process of setting up your own MCP server on Phala Cloud. Follow me on GitHub here.
Are you ready? Let’s get started!
What is MCP and Why Does It Matter?
Let’s start with the basics. The Model Context Protocol (MCP) is an open standard designed to bridge the gap between AI models—like large language models (LLMs)—and external data sources or tools. Think of it as a universal adapter: instead of building custom integrations for every system your AI needs to talk to, MCP provides a standardized way to connect them. This means your AI can access databases, APIs, or even Jupyter Notebooks (as we’ll explore here) without reinventing the wheel each time.
For developers, MCP is a game-changer. It simplifies building context-aware AI applications—think chatbots that pull real-time data or IDEs that leverage AI to manage code. It uses a client-server model: an MCP server exposes tools or data, and an MCP client (like a browser-based inspector or an AI interface) connects to it. Simple, yet powerful.
Why Phala Cloud?
Now, why deploy this on Phala Cloud? Phala Cloud is a decentralized cloud platform that combines the scalability of traditional cloud computing with the security of blockchain technology. It uses Trusted Execution Environments (TEEs)—secure hardware enclaves—to ensure your computations and data stay private and tamper-proof. This is especially critical for AI applications handling sensitive information, making Phala Cloud an ideal home for an MCP server.
Plus, it’s developer-friendly: you get a dashboard for easy deployment, low-cost plans (coming soon), and a community-driven ecosystem.
Let’s dive into how to set it up in 4 easy steps!
4 Easy Steps to Build remote MCP server on Phala Cloud
This guide will walk you through how to deploy a Jupyter Notebook remote MCP server to TEE with Phala Cloud.
You will then customize this example to suit your needs.
MCP is an open standard that enables developers to build secure, two-way connections between their data sources and AI-powered tools.
The original Jupyter Notebook MCP server is implemented in here. We forked it to this repo and change the transport to sse to support the remote server. Now you can test locally and deploy the MCP server to Phala Cloud with the docker compose file in this repo.
Step 1: Local development
Run Jupyter notebook MCP server locally
At the root of this repo, run the following command to start the Jupyter notebook server and the MCP server.
- The Jupyter notebook server will be available at
http://localhost:8888and the MCP server will be available athttp://localhost:8000according to the setup in the docker compose file. - You will need to provide the token to access the Jupyter notebook server, which is set to
phalain the docker compose file. - In a new terminal, run the MCP inspector. The MCP inspector is an interactive MCP client that allows you to connect to Jupyter notebook MCP server and invoke tools from a web browser.
npx @modelcontextprotocol/inspector@latest - Open the MCP inspector in your web browser:
http://localhost:5173 - In the inspector, set Transport Type to
SSEand enter the URL of Jupyter notebook MCP server, http://localhost:8000/sse, and click Connect. Then in the Tools tab, you can see the tools provided by the Jupyter notebook server.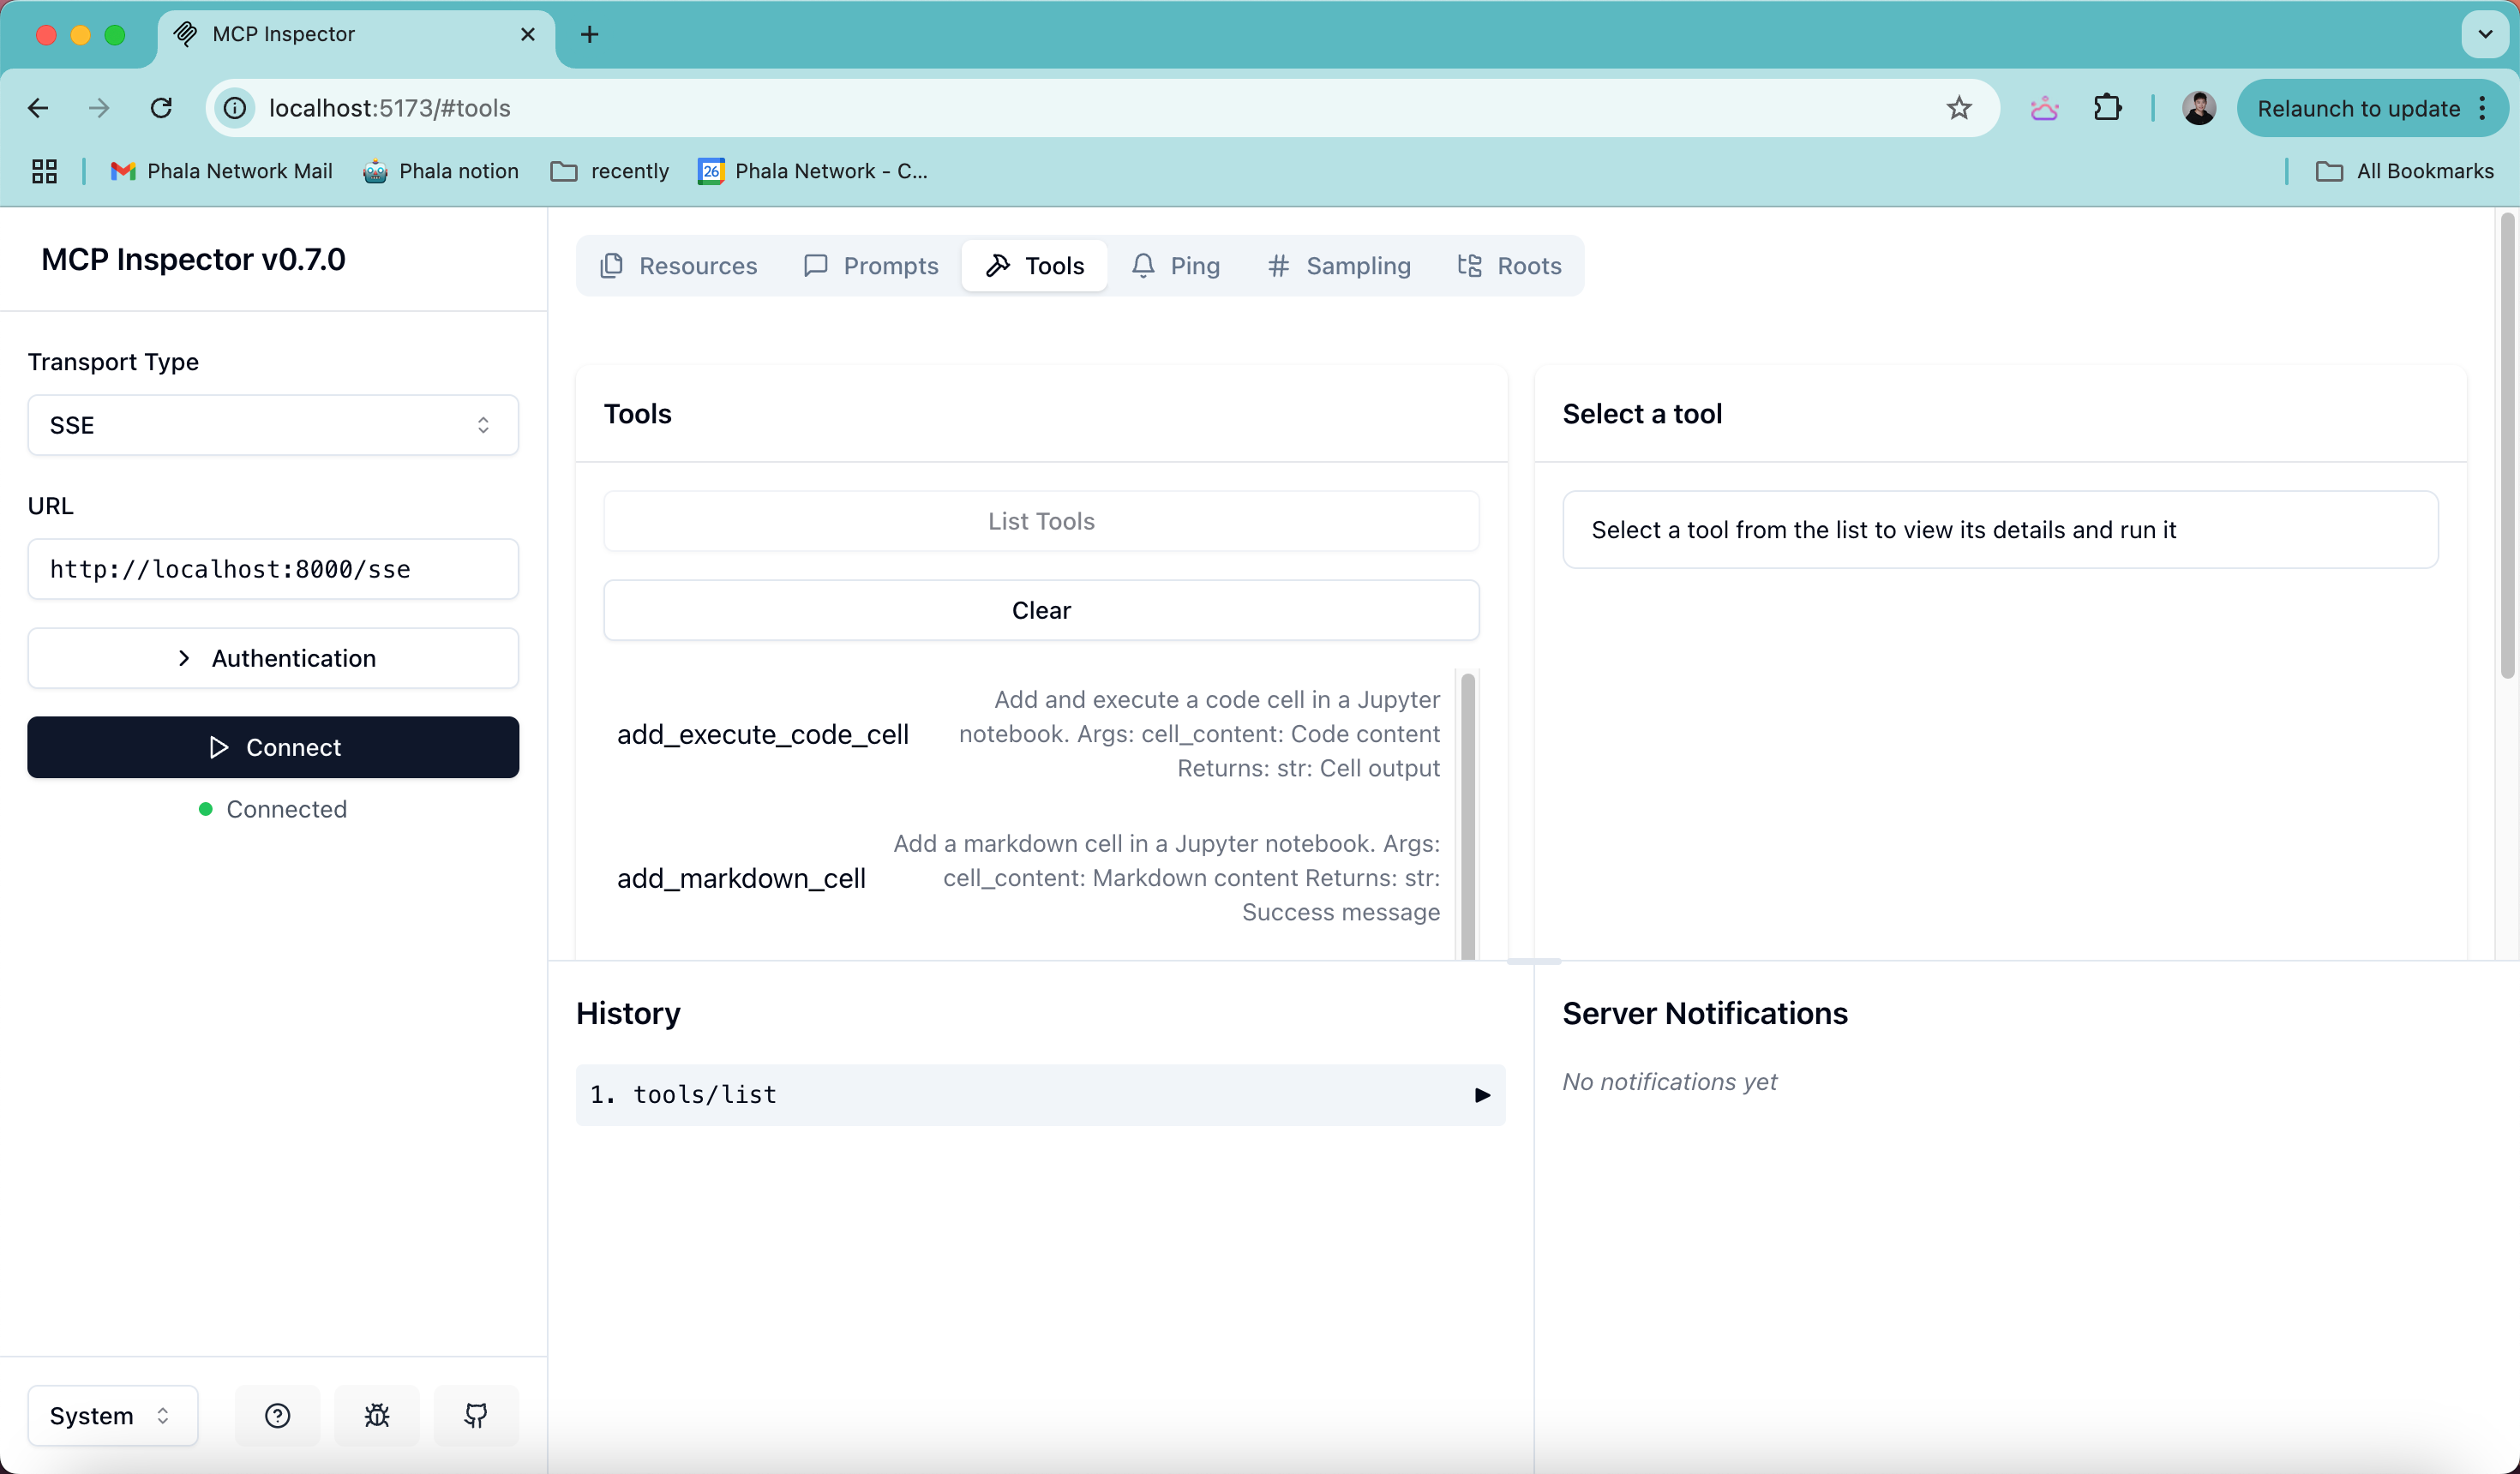
Interact with the MCP server
- Note that the MPC server is running locally at
http://localhost:8000/sse, so next we need to config the MCP client to connect to the MCP server. The screenshot below shows the config with Cherry Studio.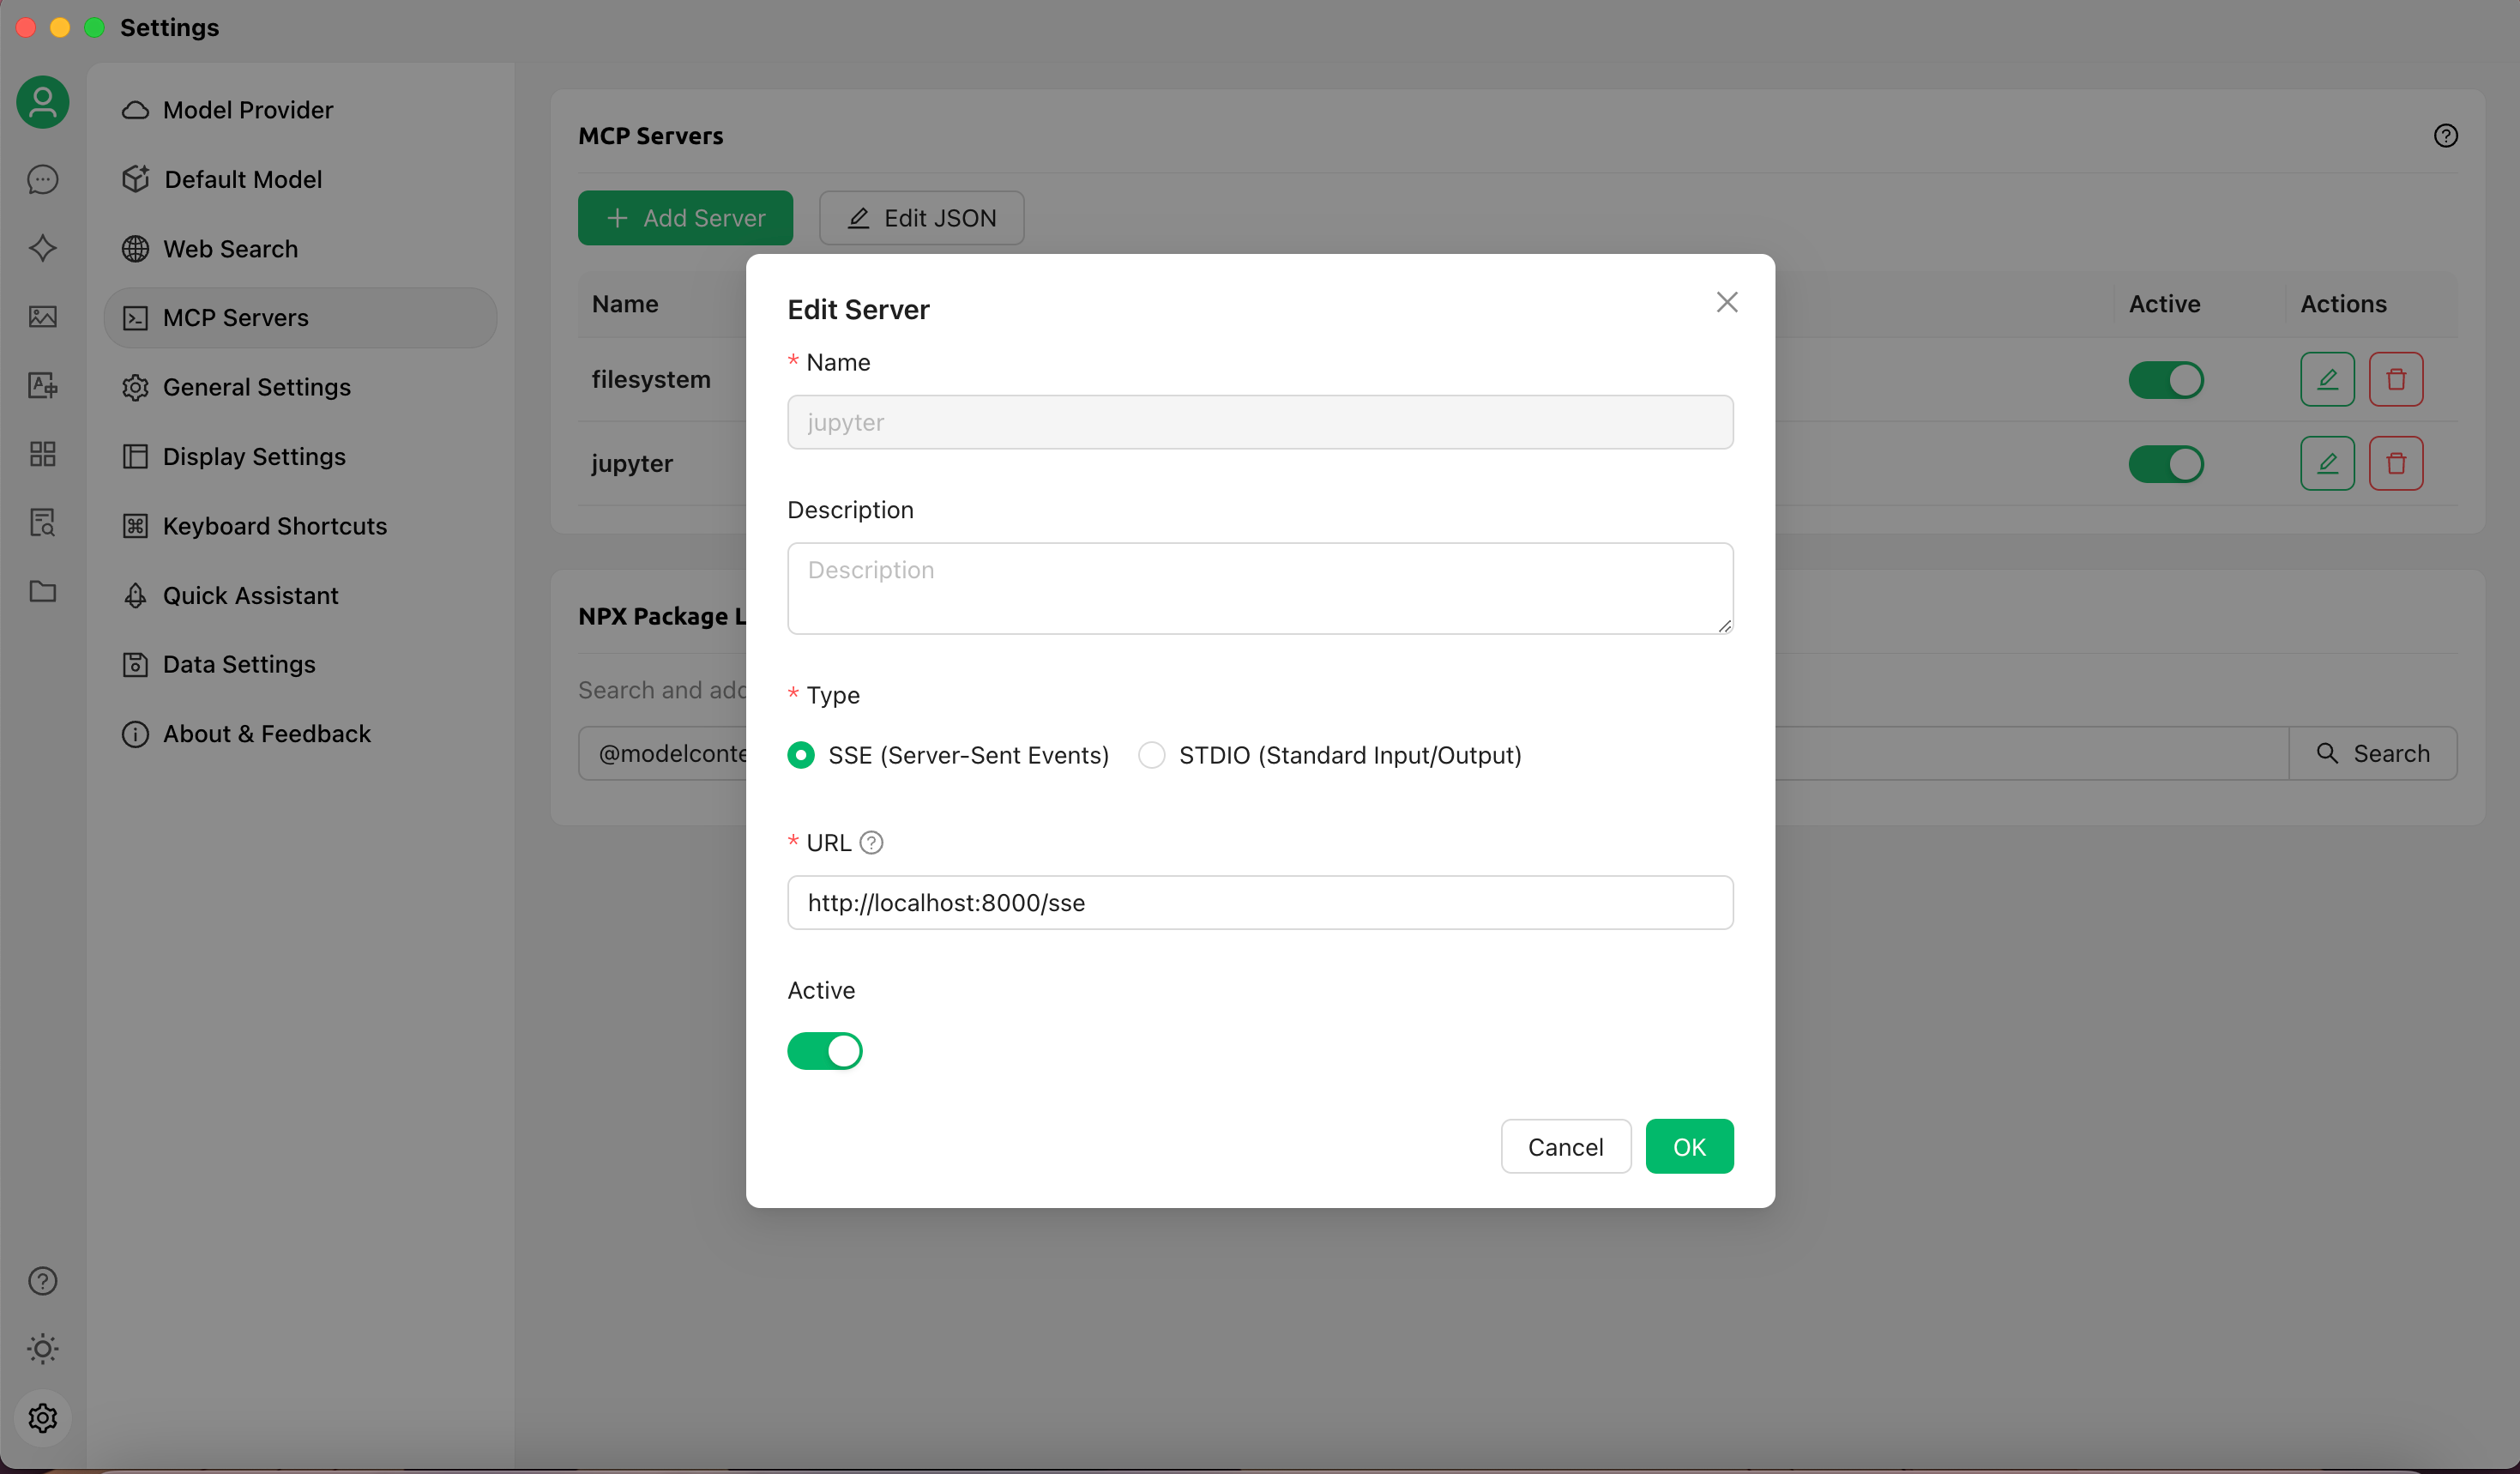
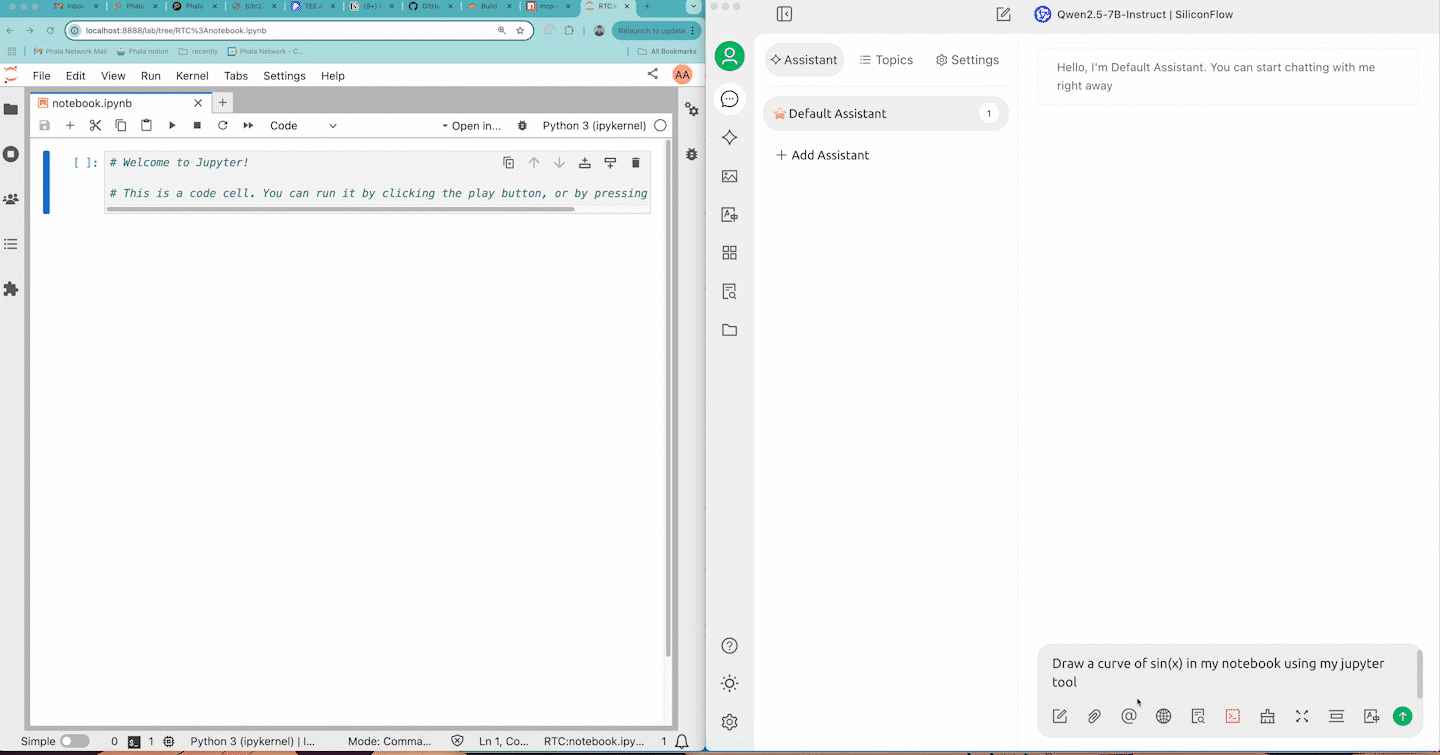
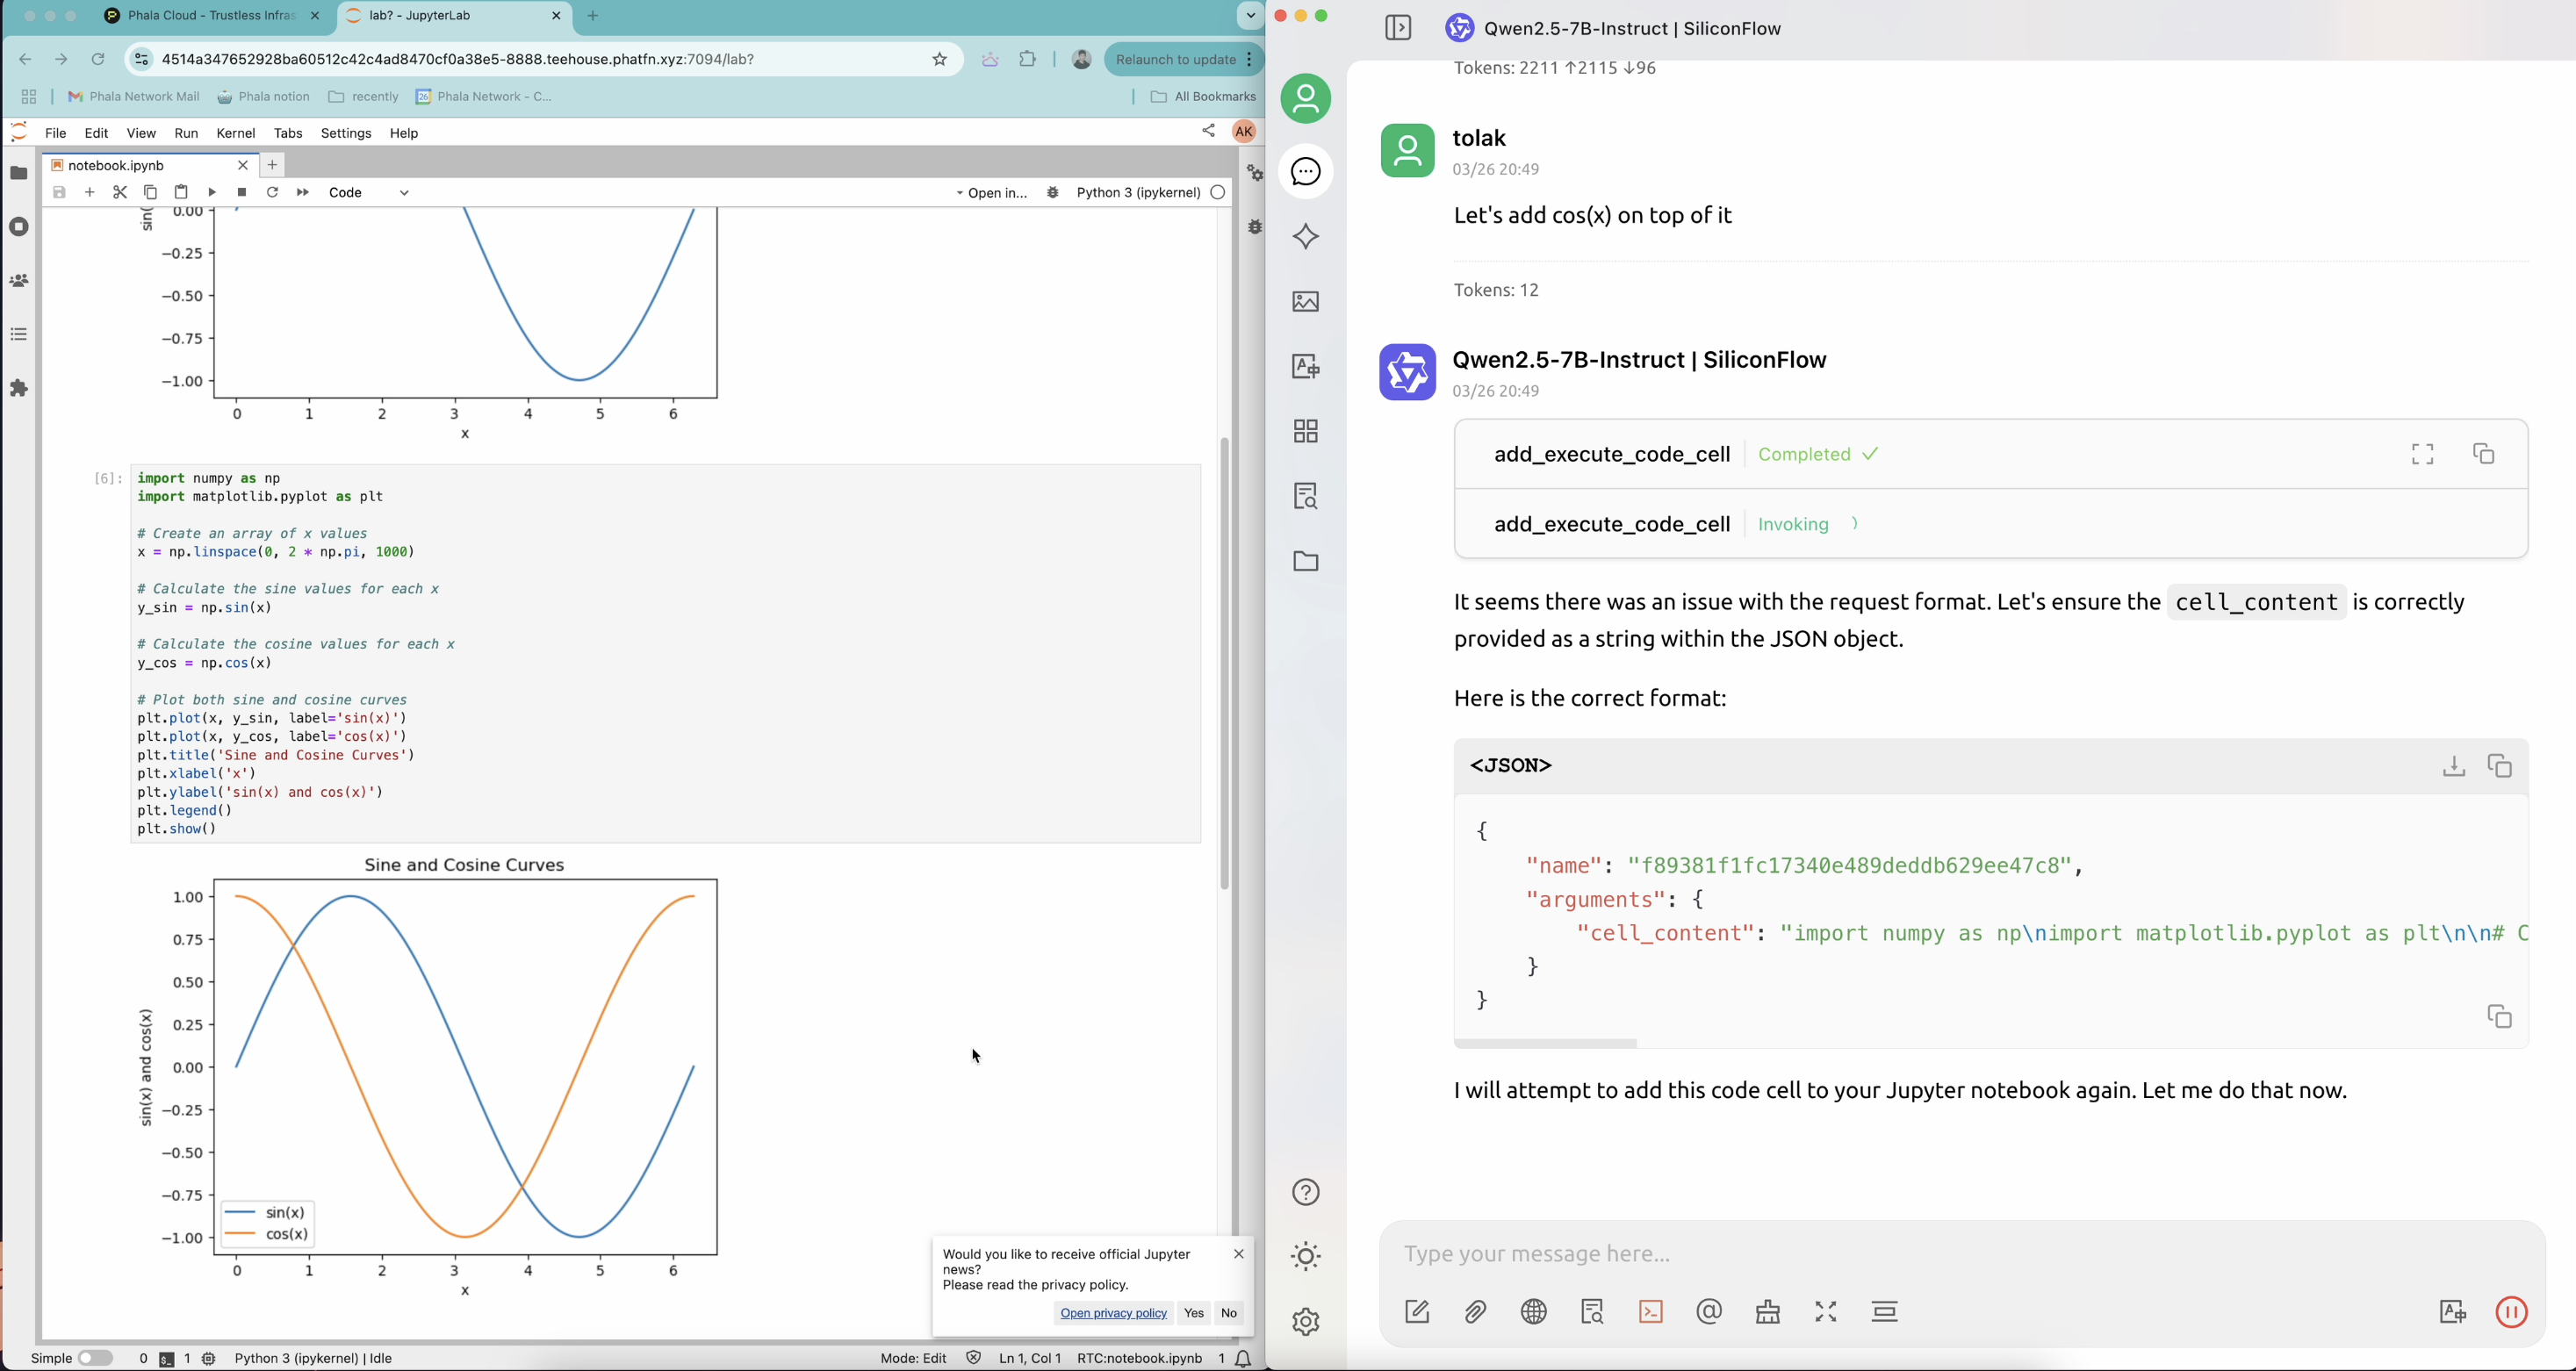
- Navigate to the chat page and you can type in your prompt to ask the client use the LLM to help you manage your notebook, for example we ask the LLM to draw a curve of sin(x) on the notebook.

- For other MCP clients like using Claude Desktop, you can use the following config by edit the config file.
mcp-remote is a tool used to connect an MCP Client that only supports local (stdio) servers to a Remote MCP Server, with auth support. To avoid the fetch error, we use full path to specific a specific version of
npxin the config.{ "mcpServers": { "juypter": { "command": "/Users/wangwenfeng/.nvm/versions/node/v22.0.0/bin/npx", "args": [ "mcp-remote", "http://localhost:8000/sse" ] } } }
Step 2: Deploy to Phala Cloud
Deploy the MCP server to Phala Cloud
You can follow this tutorial to deploy your MCP server to Phala Cloud. Here are general steps to deploy your MCP server to Phala Cloud:
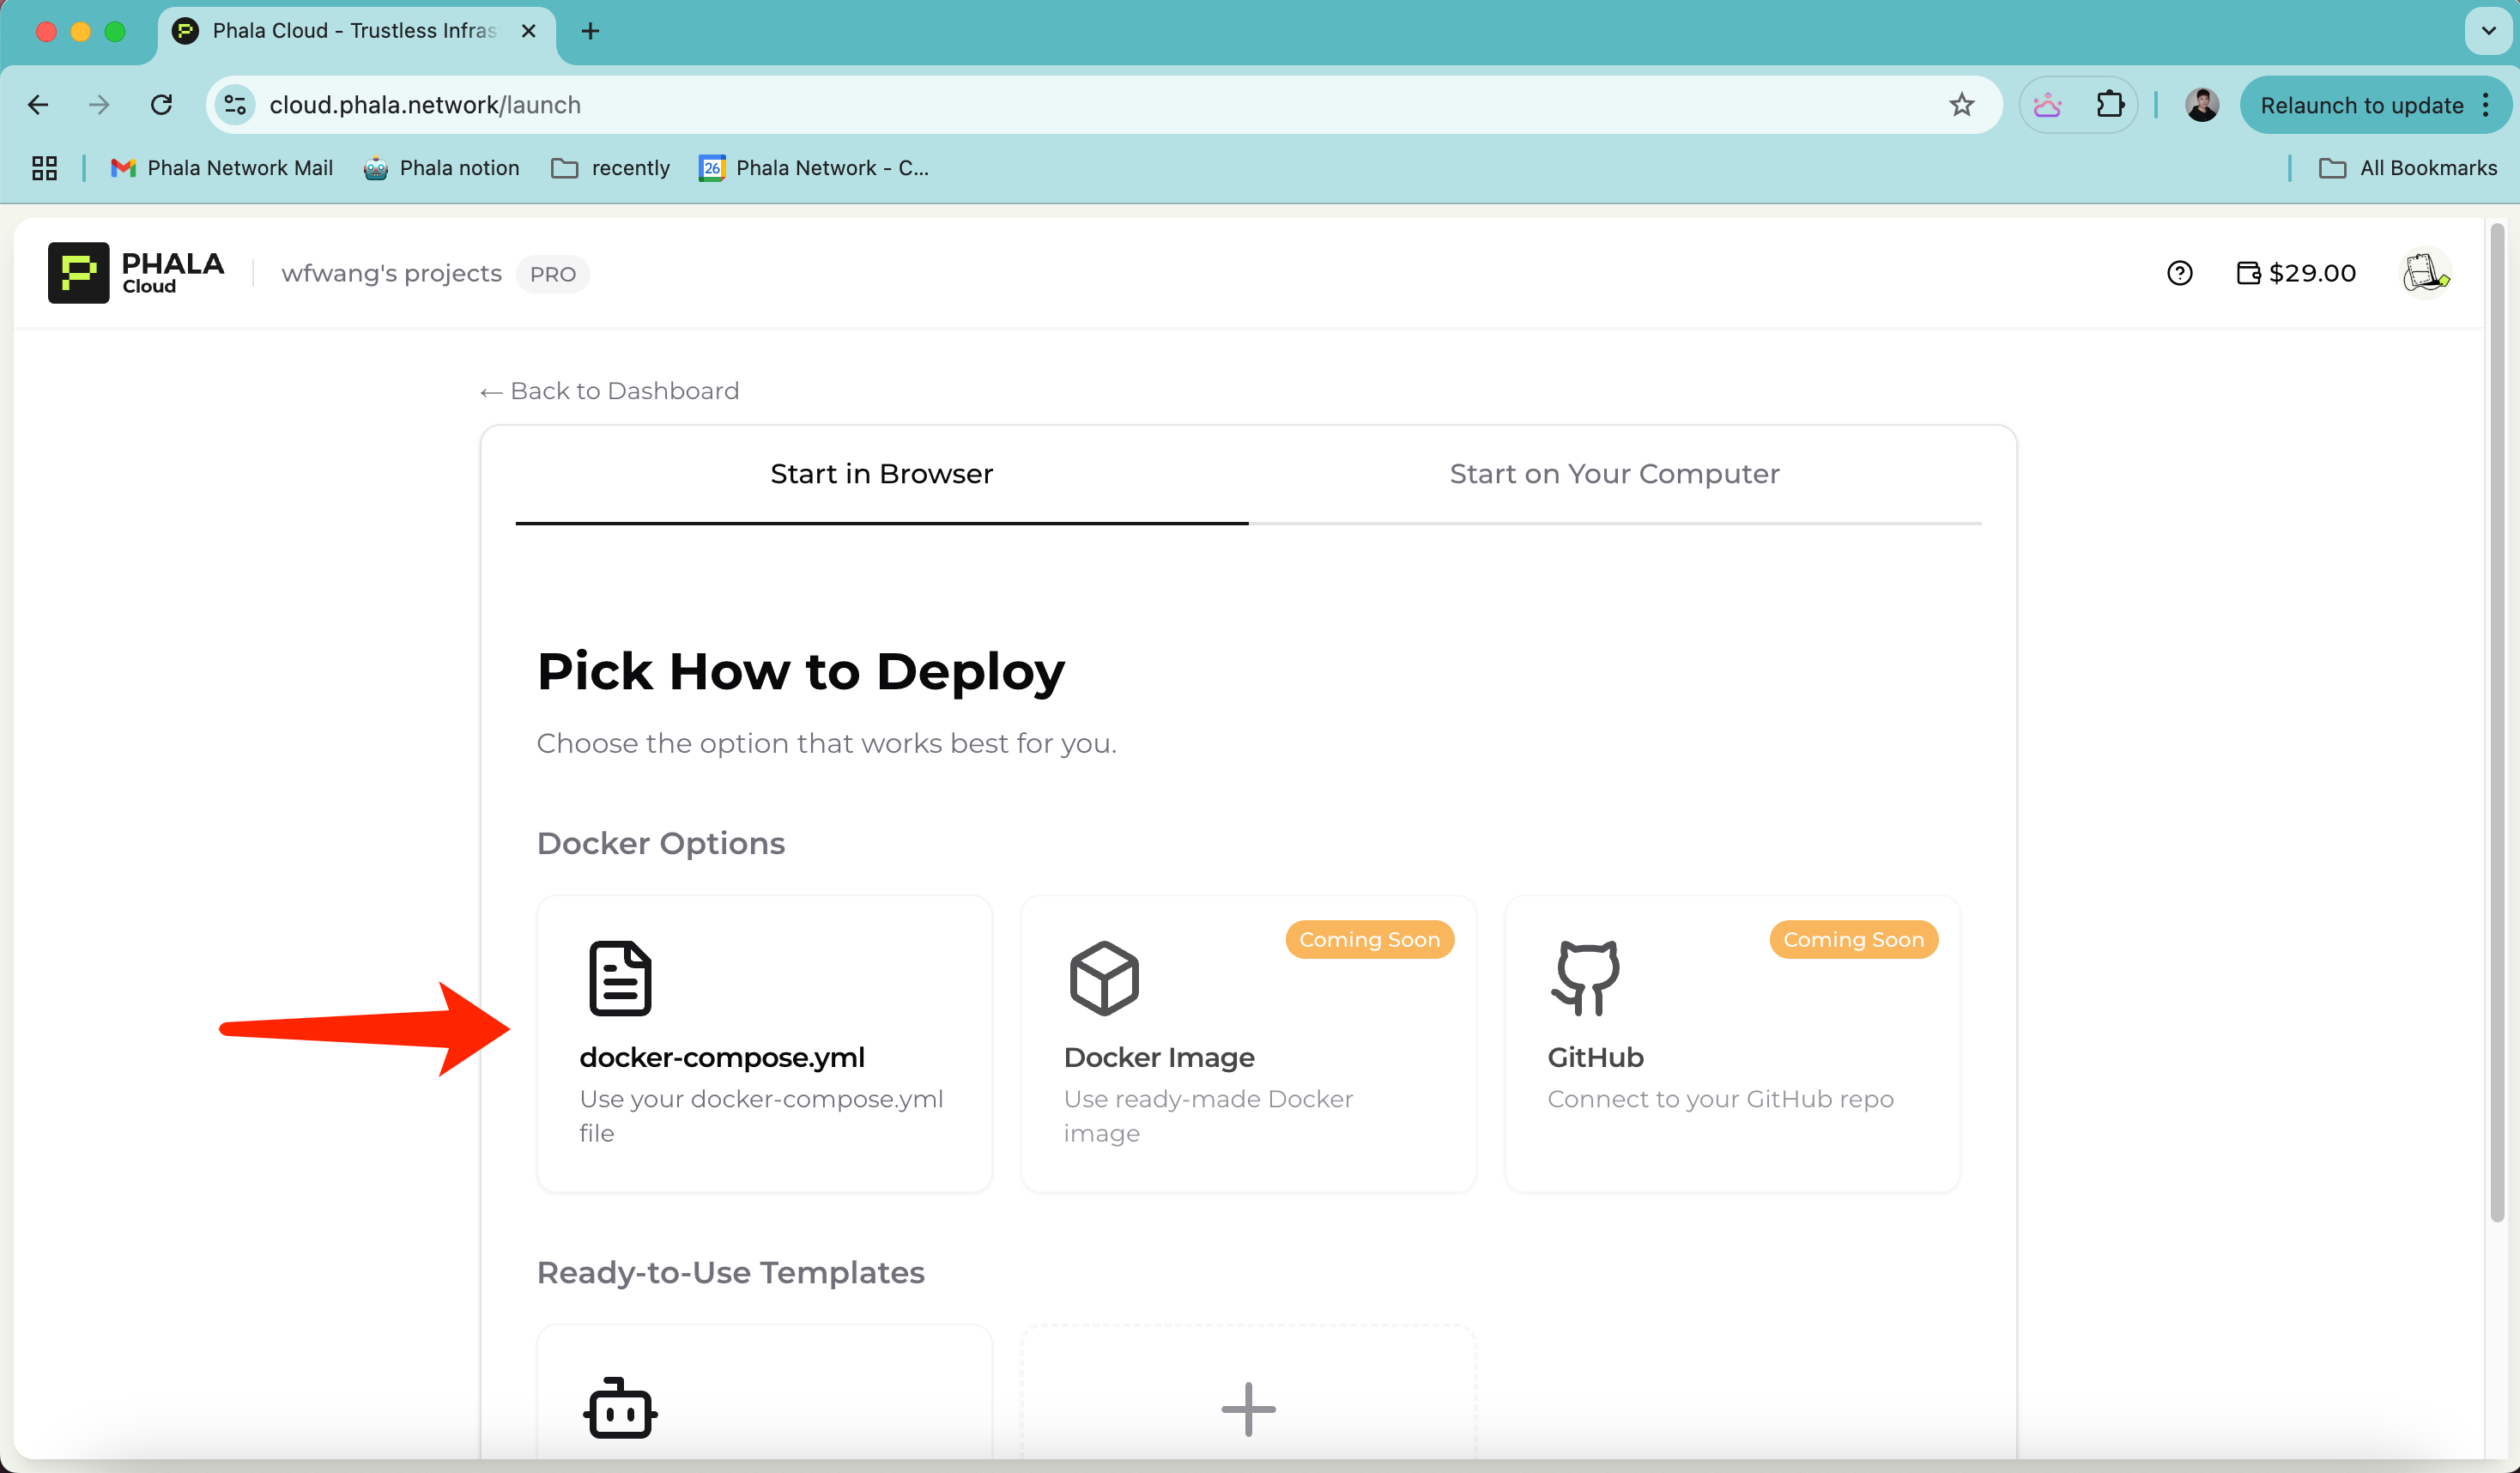
- On the Phala Cloud dashboard, click Deploy and choose Docker Compose option for deployment.
- Navigate to Advanced tab, copy this docker compose file to the input box.

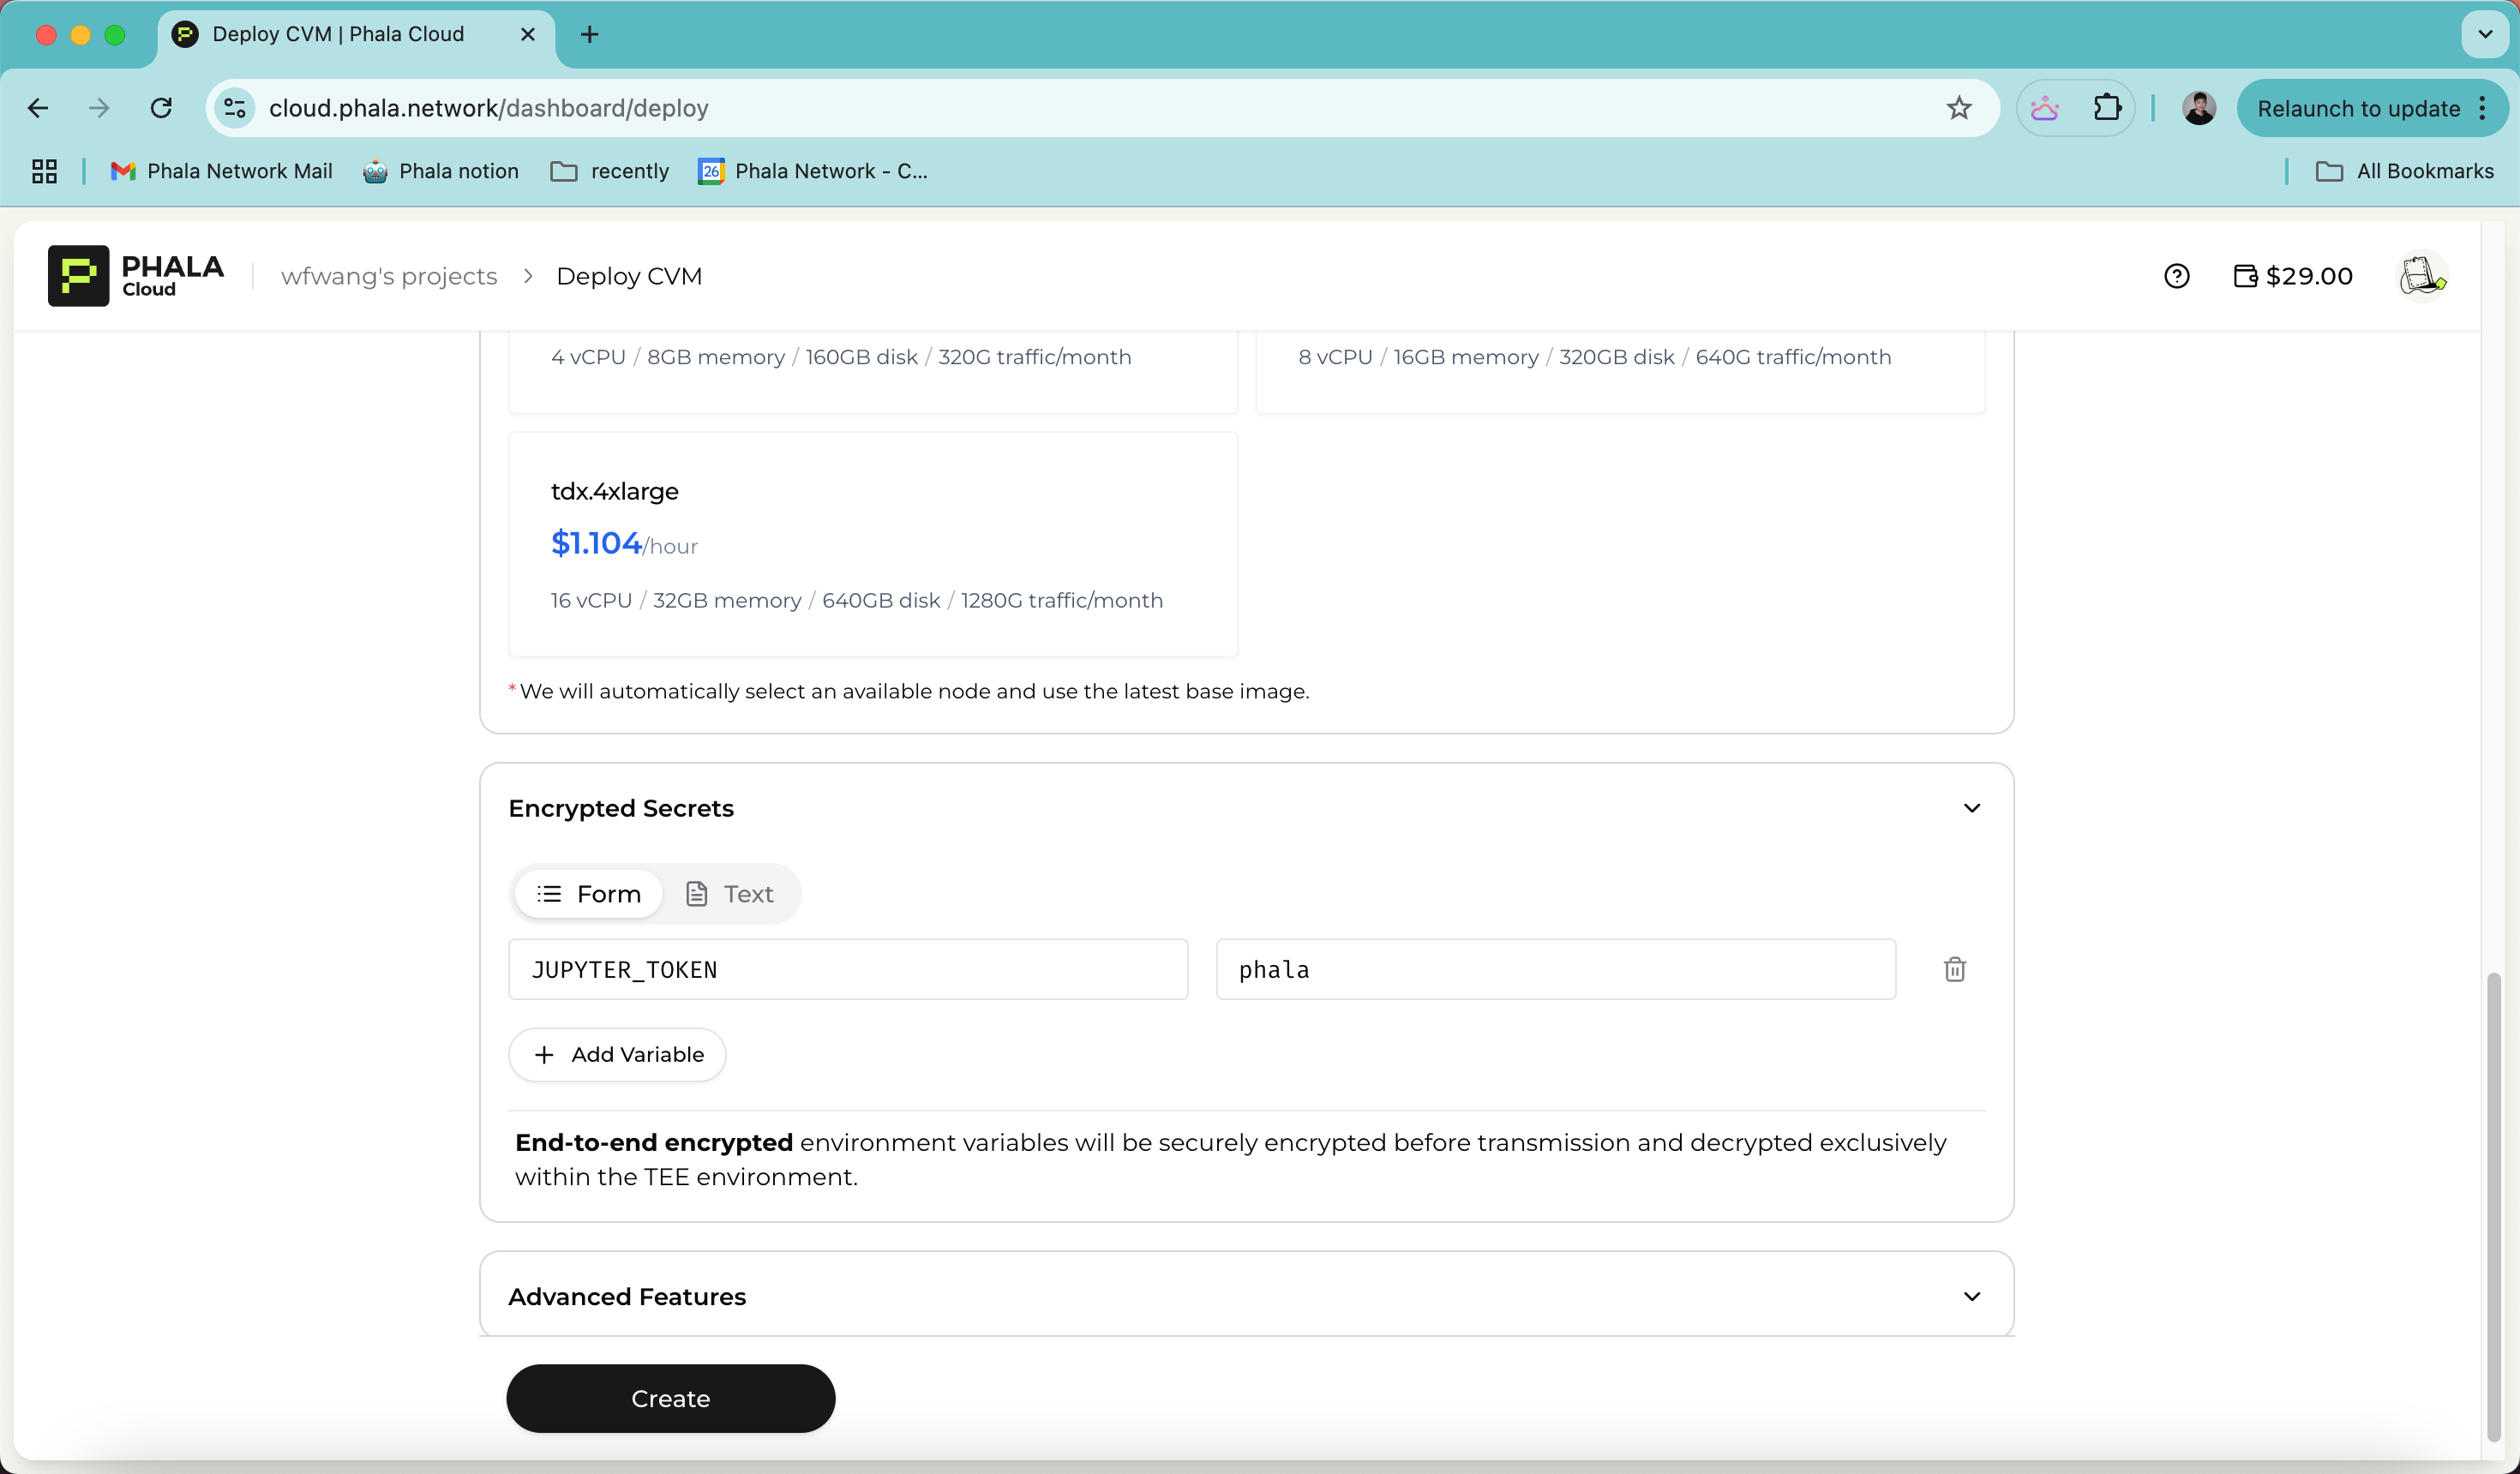
- Choose a plan and set the environment variables JUPYTER_TOKEN in the Secure Environment Variables section, click Create.
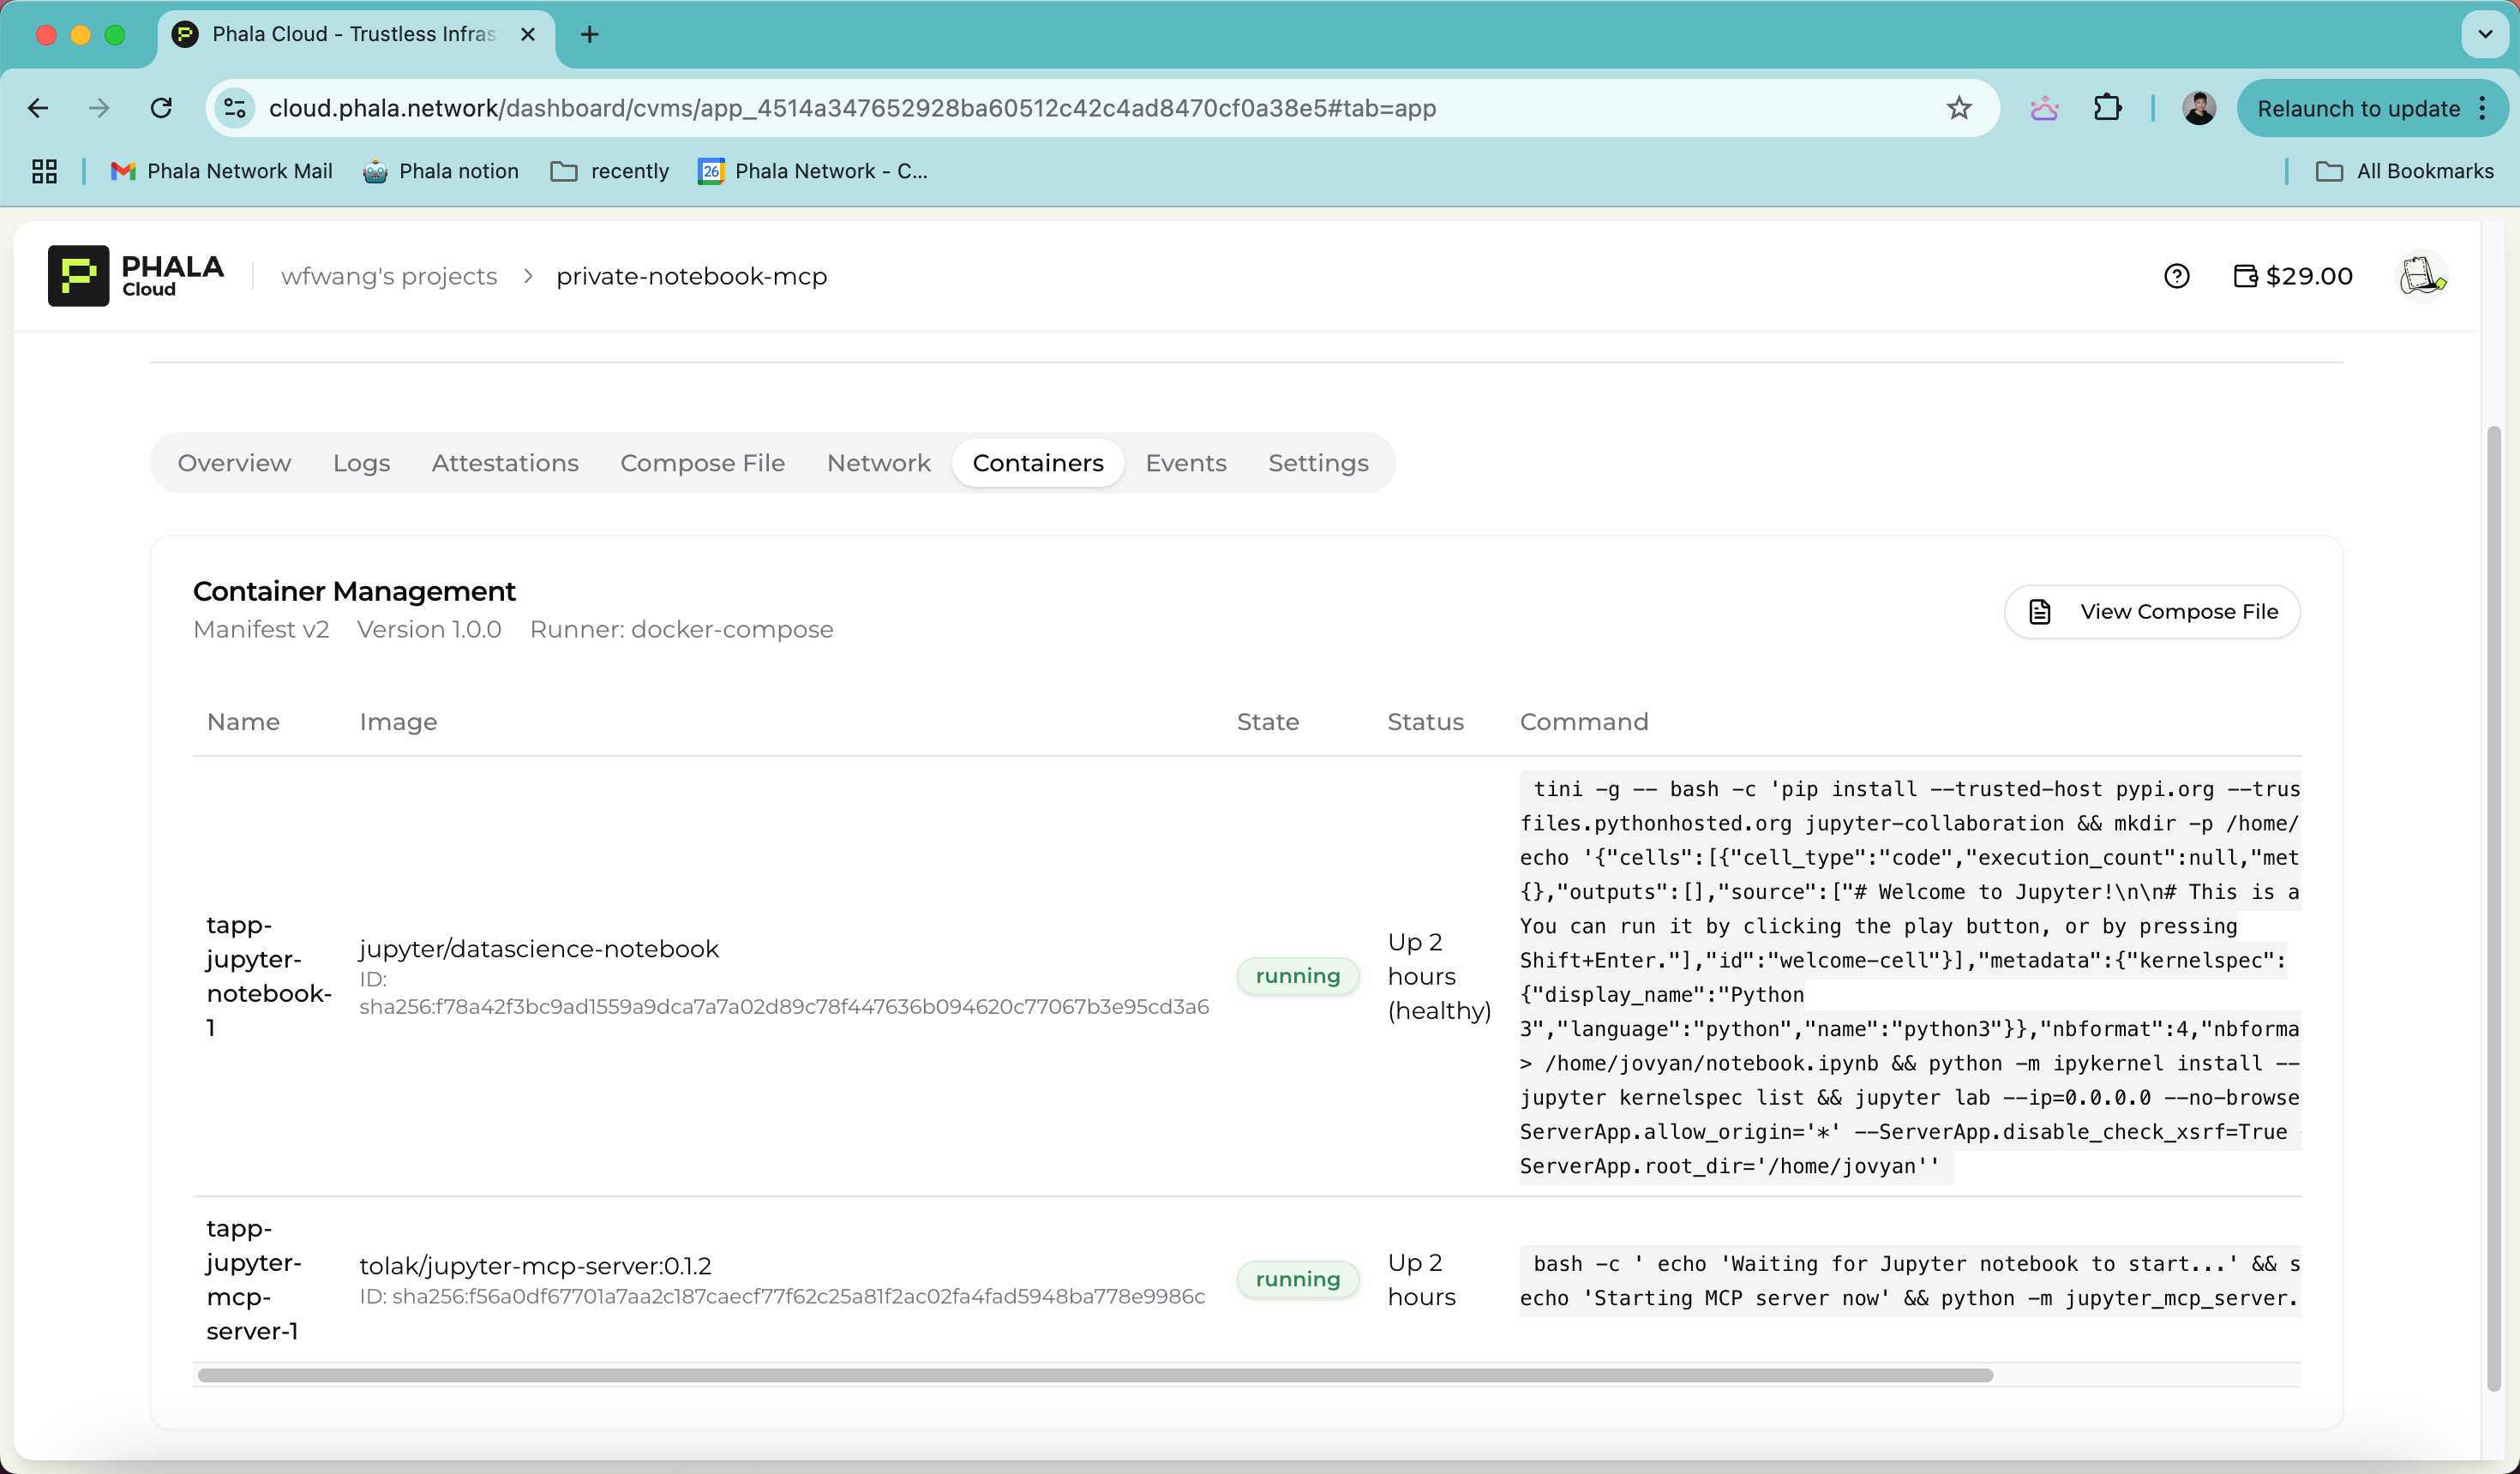
- Wait several minutes here because the VM will download the docker images, after you see the status become Running you can navigate to the Containers tab and you will see the Jupyter notebook container and the MCP server container are running.
Step 3: Configure the MCP client to connect to the remote MCP server
By navigating to the Network tab, you can find the Public Endpoints of the Jupyter Notebook and the Jupyter MCP server. You can configure a MCP client to connect to the Jupyter MCP server with it's public endpoint.
https://4514a347652928ba60512c42c4ad8470cf0a38e5-8000.teehouse.phatfn.xyz:7094here is the public endpoint of the Juypter MCP server.{ "mcpServers": { "juypter": { "command": "/Users/wangwenfeng/.nvm/versions/node/v22.0.0/bin/npx", "args": [ "mcp-remote", "https://7ea38363423bf111180406f5c37c40fa48482d40-8000.dstack-prod2.phala.network/sse" ] } } }
🎉 Congrats! You can interact with the server that deployed on Phala Cloud now.
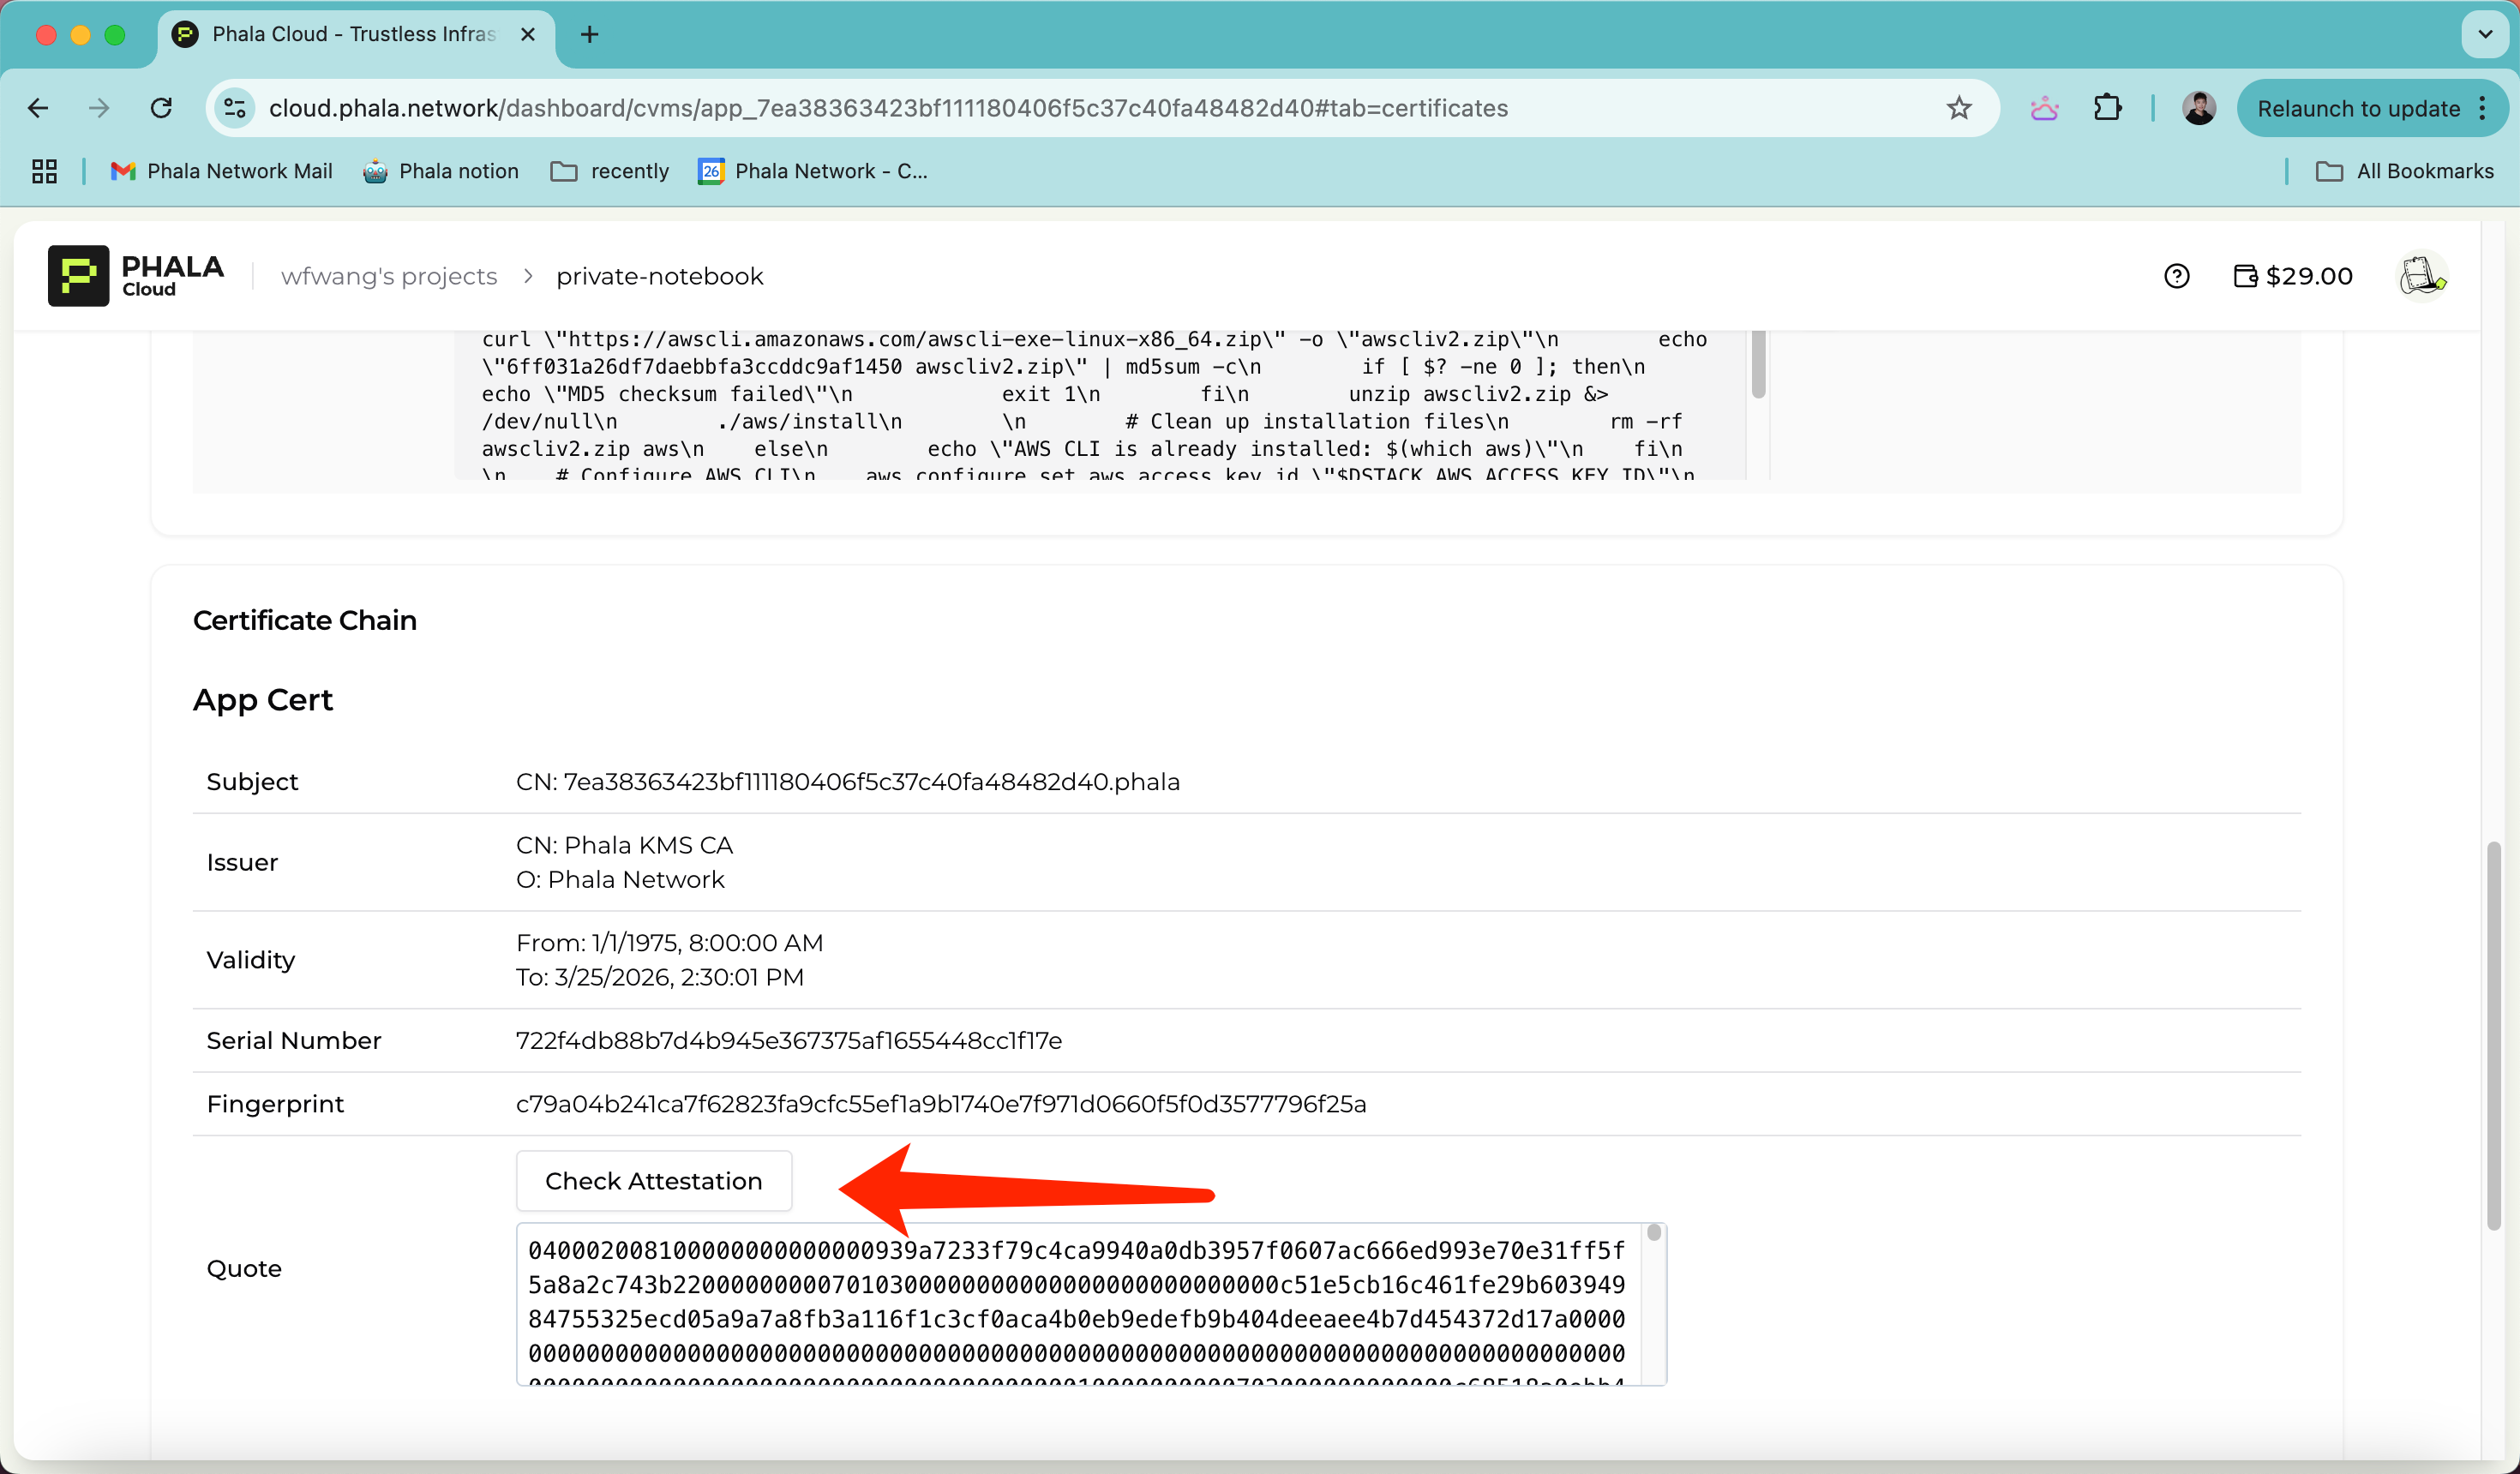
Step 4: Verify the Attestation of the MCP server
Navigate to the Attestation tab, you can see the attestation of the your CVM. The attestation is a proof that the MCP server is running on the TEE. You can click the Check Attestation button to verify the attestation on the explorer.
Further more, you can generate the attestation of the MCP server inside the container, head to this guide for more details.
Troubleshooting
- MCP Inspector:
Error in /sse route: ReferenceError: fetch is not definedThis is because you are using an older version of node.js in your system. Please upgrade to a newer version.